An Automated NSW Smart Solutions Guide
Wirenuts have been around a long time, and are totally acceptable for all kinds of wiring situations. But, for controls in particular, they can be very ‘fiddley’ when it comes to the small wire gauges, sensitive components, and any installations where things may need to be disconnected and reconnected regularly. We’ve come to find a much better solution for getting controls wiring connected up in the field: The Wago 221 Series Lever-Nuts®.
What the heck are Lever-Nuts®?
Electrically, Lever-Nuts do the exact same thing wire nuts do. They connect wires. When you look at them though, things are clearly fancied up a bit from the traditional screw-cap style connectors.
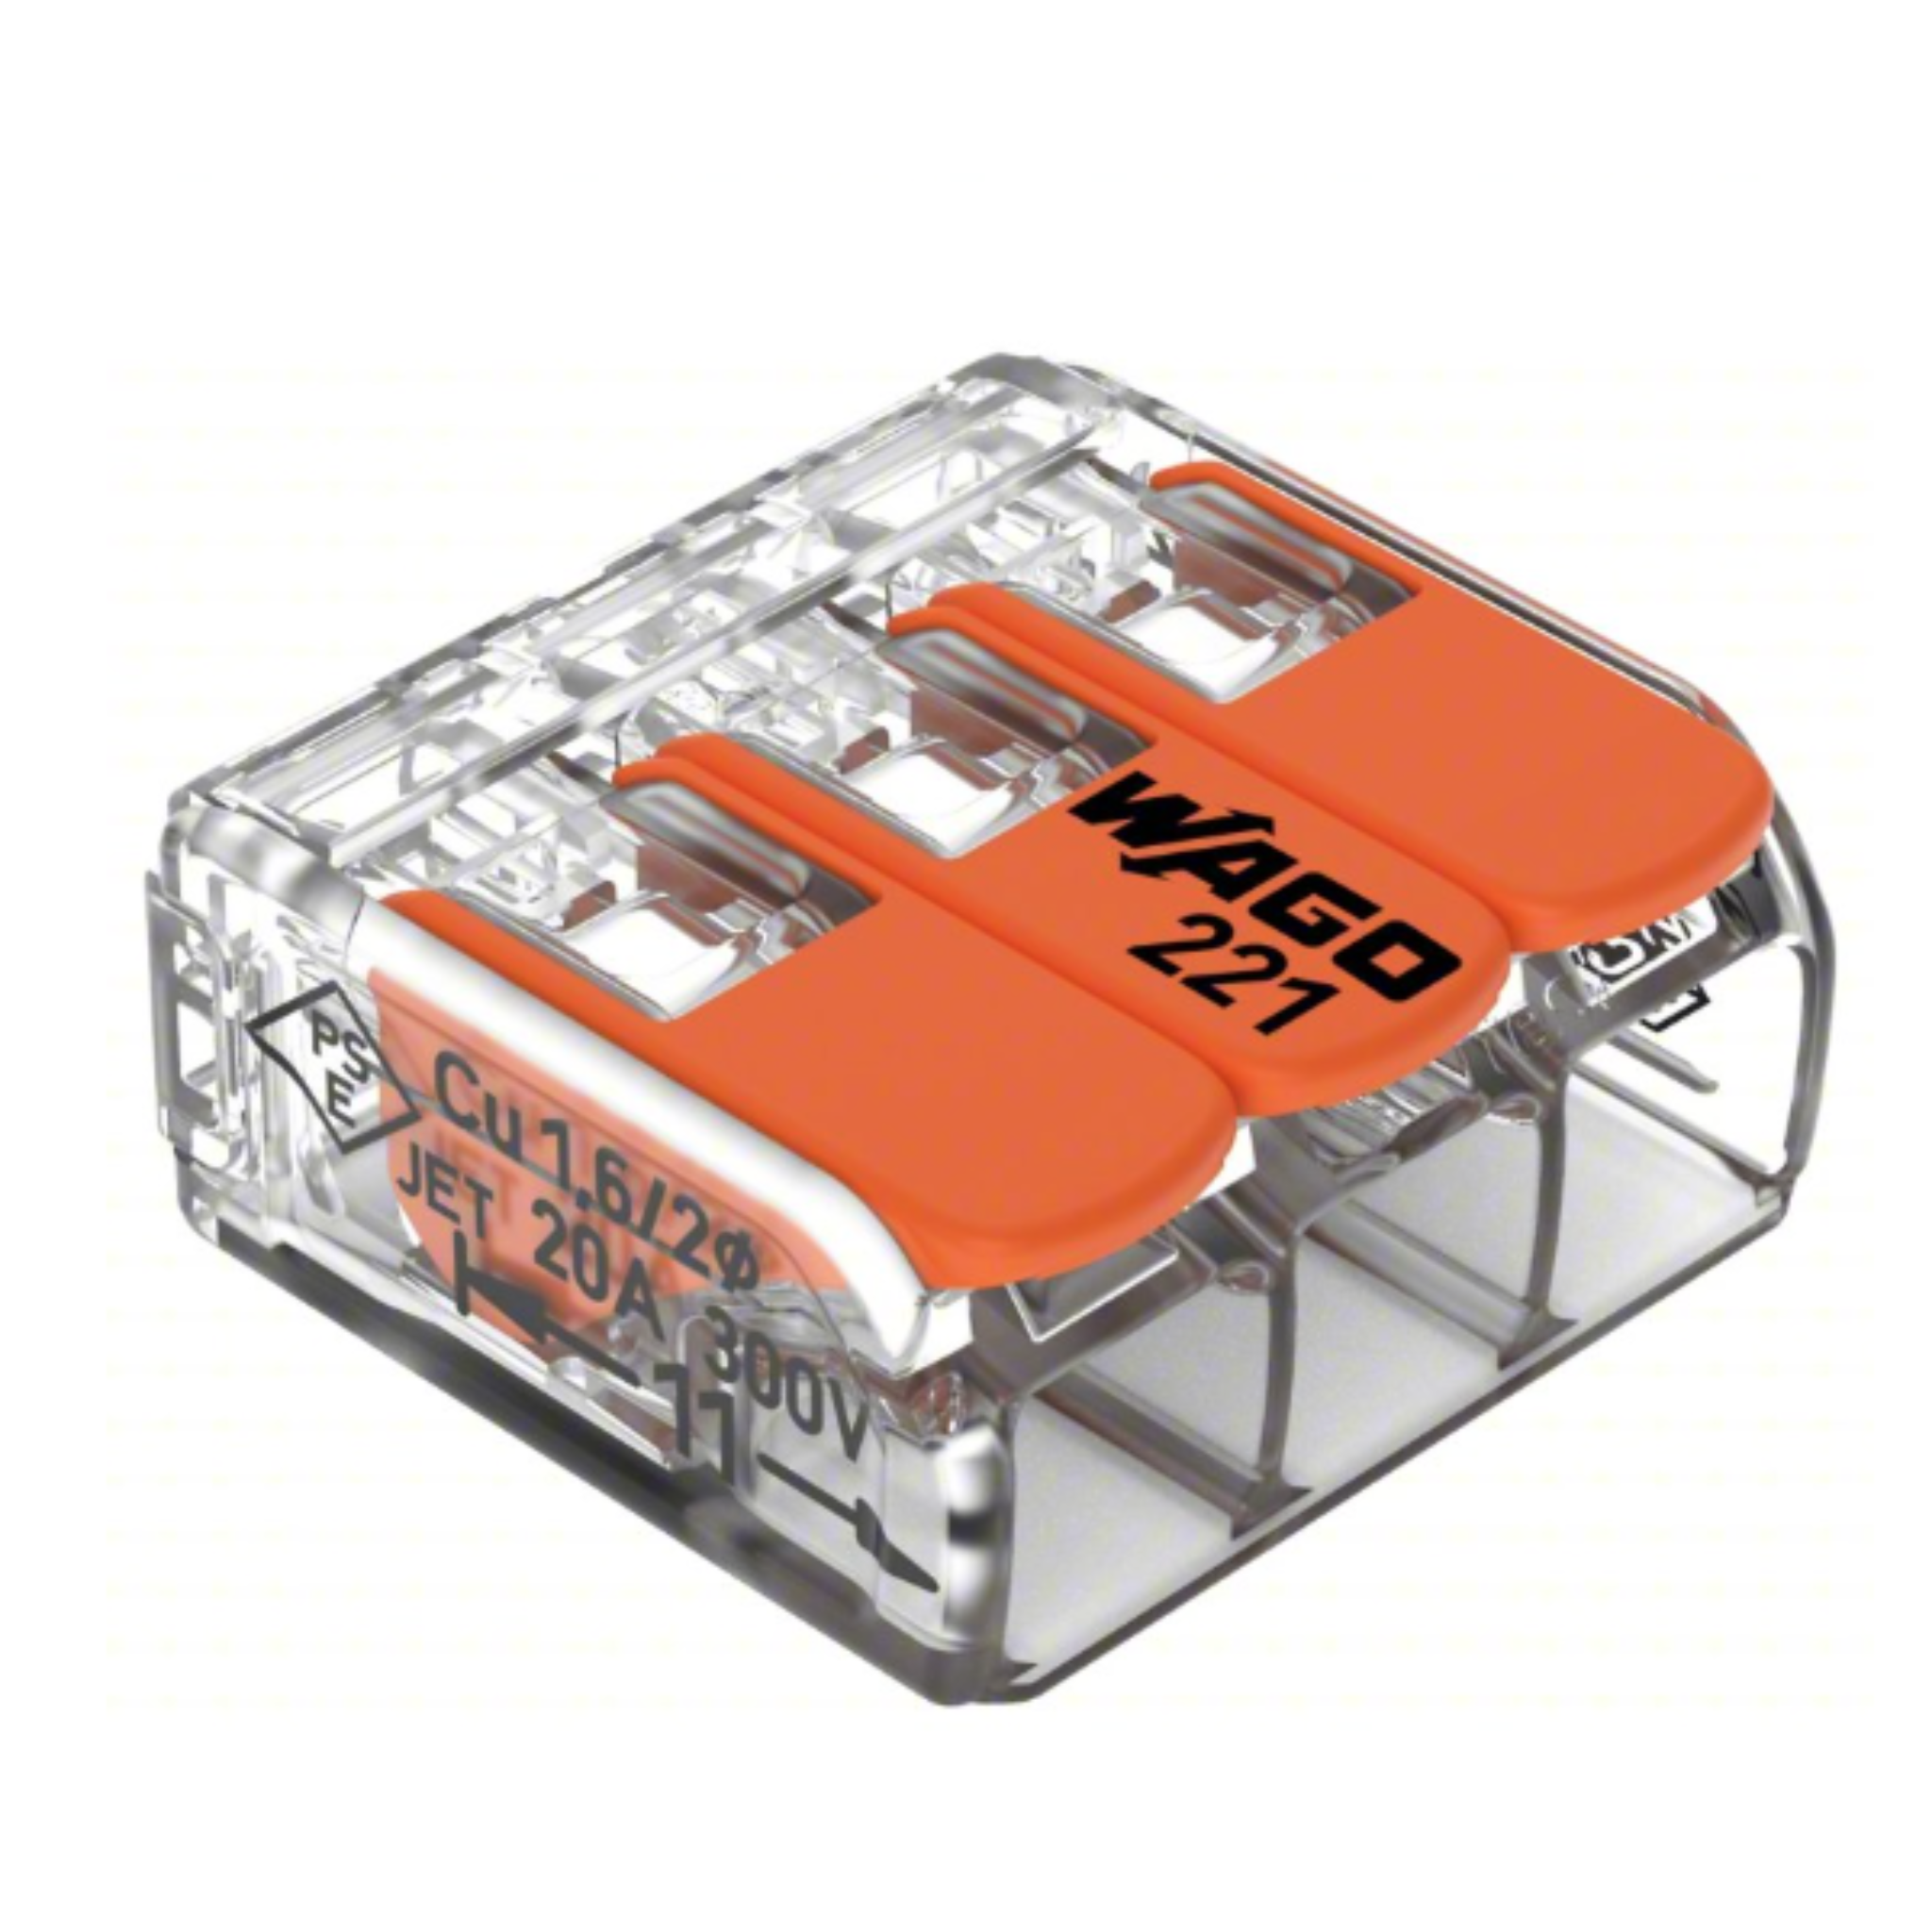
Lever-Nuts® have (you guessed it) Levers. Lift a lever; insert a stripped conductor into the corresponding hole; snap the lever back down. That’s it. Wire secured. Repeat for each of your conductors.
The Lever-Nuts® contain a snappy clamp with each lever to keep the wire firmly in place, and an internal busbar to get all of your conductors electrically tied together.
The part shown in the photo here is built for 3 conductors, but Wago also makes them in 2-wire and 5-wire varieties, so there are some options depending on your needs.
Why Using Wago Lever-Nuts® Is Awesome
There are some more generalized reasons we like these things, and we will put those down at the tail end of the post, but the use case that prompted this whole write-up in the first place, was a series of VAV controllers (or Air Valves, or Terminal Units, or Zone Controllers).
These controllers were all in the ceiling with two primary connections: power (typically 24v), and communications (typically 3-wire RS485, with whichever vendor’s protocol flavor of choice), and both usually some daisy-chain trunked style design.
Problems with the ‘Old Way’
What we usually see in pre-existing installs is a trunk cable leaving from a building controller of 24v transformer routed through the interstitial, into the a small knockout hole at the first VAV enclosure, the conductors landed into some on-board terminals or a large terminal block, and then another length of cable landed at the same terminals(!), routed back out through the same little knockout, and pulled on to the next VAV to continue the daisy chain.
There are many inconveniences here:
- Double-terminating wires get messy, as many terminal connections aren’t sized to accommodate double the intended wire thickness. They may not clamp the connection as solidly as it should, risking intermittent connectivity, tiny arcing, and wires falling out of the terminal altogether.
- The knockouts can get crowded. There is likely other stuff headed in and out of the control enclosure for sensors or actuators, and now there is double the cabling for power and comm, making it more difficult to do service and adjustments in the future, or even just easily trace wires when troubleshooting.
- The terminal blocks things are landed on are almost guaranteed to be too large to pass through the cable knockout, so if the controllers or cabling need to be relocated or rerouted in the future; now everything will need to be de-terminated (hope the install team was on top of all their wire labeling duties!), safed off, pulled back, taken to the new location, and essentially have the installation repeated.
- Do you need to demo some controllers or add some new ones, as part of a remodel project? Get ready to deal with all of the above, plus coordination of what could be quite a bit of downtime for devices downstream in the daisy chain, while trunks are cut, wire nuts undone, and conductors un-twisted, double-terminated wires separated out and managed (You are doing demo, and not abandon-in-place, right?) If your site has someone monitoring your building, they will notice when half the floor plan goes black while someone is trying to thread a square terminal block through a round hole for too long.
The Lever-Nut® Way
Lever-Nuts® solve all of those technician pains. Let’s run through them again:
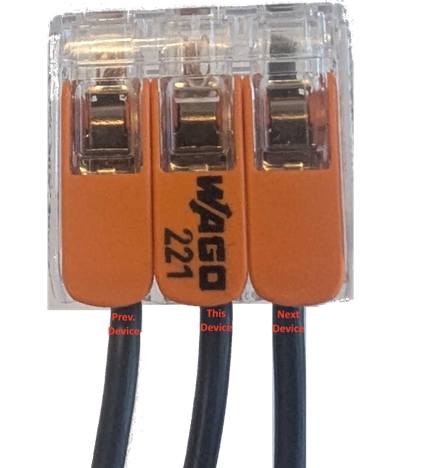
- Use a lever-nut, one for each conductor, on your trunk line, outside your terminal control enclosure. With the 3-terminal nut, we connect the incoming conductors to the left terminals, and the conductors for the next device in the chain to the right-hand terminal. Those middle terminals are what you use for the device you’re working on. Pull a short length of new cable into the enclosure and terminate as usual, no double landing required, and lock in the other ends under those middle levers. Everything is terminated nicely and tidily per design. For reference, see the image below.
2. The process in #1 eliminated the messy terminations and reduced the number of cables routing through the knockout hole.
3. Removable terminal blocks are there for your convenience, but not if you can’t get them where they need to go. If they are wired up as described in #1, you don’t have to worry about it; just flip open the levers on the nut, slide the conductors out, and thread just the cable back through the knockout. When your work is complete, thread it back through and re-clip it. No terminal screw fuss.
4. Here is the magical benefit, honestly: Installing lever-nuts as described, at the trunk line, suddenly reduces the risk a lot when it comes to power or communications disruption. Is a controller being removed or replaced? Open the middle lever on each of the nuts, disconnect your cable, and that’s it; you’re done, the controller has been removed from the trunk and/or de-energized. Because the trunk conductors are still connected, both incoming and outgoing, to the lever-nut, there is no disruption to anything downstream of your work.
The same philosophy applies if something needs to be added to the trunk. If a controls technician has the VAV ready before an electrician runs all the trunks, just leave the lead cable with lever-nuts waiting. If the electrician is done with the cable pulls when controls show up (yes, it would be great if the electrician put in a set of lever-nuts exactly where needed as he passed through the area, but…) interrupting the trunk to insert the nuts is a quick process, and doesn’t need the controls work at the VAV to be in any particular state of readiness before it happens. (Just be sure to schedule/notify with anyone that there will be an interruption or breaker opened, etc. The interruption will be minimal, as fast as you can strip wires and flip levers, but it will still happen.)
5. BONUS FEATURE: Lever-Nuts, at least the Wago brand ones mentioned here, have a small opening on either side intended as a Test Port, so that you can insert probes from your tester or multimeter, without having to de-terminate any of the connections. I don’t know if you have ever tried to take a reading out of the full traditional wire nut, but it is not one of our favorite things.
About those traditional wire nuts…
You can use traditional wire nuts and Lever-Nuts® interchangeably for the same applications. While lever-nuts have a slightly higher cost, they offer significant advantages and conveniences:
- The biggest advantage is the ease of making the terminations, and more importantly, disconnecting them. If you have 3 (or more) conductors in a traditional wire nut and need to remove just one of them, you are almost guaranteed to lose continuity between the remaining ones. At the same time, you untwist and separate everything to get your wire out. Due to the lever-nut’s design, additional conductors can be added or removed without disturbing anything else, provided you have spare lever terminals; and if you need 2+ additional terminals, and only have 1 spare, you can just jumper in another lever-nut.
- Lever-Nuts® accommodate multiple wire gauges, and both solid and stranded wire, making it very easy to connect those together (the 221-413 depicted earlier accepts 24AWG to 12AWG). Twisting different-sized wire together in a traditional wire nut gets increasingly sketchy as the difference in gauge increases, and attempting to twist stranded and solid core wire together is just asking for one to slip out (or get cut up internally).
- You cannot overtighten (or undertighten) a Lever-Nut. Its clamp is going to hold, and there isn’t a risk of breaking, pinching, or twisting of fine conductors or having things come loose.
- Lever-Nuts® are reusable. This point may be more controversial, and we have seen it done all the time, but it is generally not recommended to reuse traditional wire nuts. The mechanism by which traditional ones work (plastic caps with internal metal threads) leaves it open to wear and tear on the threads, and they can become less effective over time. How can you tell if they’ve worn out? You can’t, until you try and use it.
Common Sense Caveats
The Wago Lever-Nuts are great (clearly), and we use them anywhere we can instead of traditional wire nuts. That said, they aren’t magic, and they aren’t going to open up a whole new world of ways and locations you can splice together wire.
- Read the spec sheets and make sure you are getting the correct component for your specific job. There are multiple sizes to accommodate different ranges of wire gauge, and there are variants in the product line for different installation environments, just like traditional components.
- Lever-Nuts® are not (or at least should not be) a substitute for terminal blocks/strips. If a new panel and enclosure are being fabricated, use proper panel components, and terminate and jumper appropriately; don’t just wing 30 of these things in there and call it a day. That said, if you are out at a jobsite and have to ad hoc a solution, Wago does make some accessories that allow you to seat a handful of lever-nuts into a small clip that can then be screw or rail-mounted, so you can make these things look pretty clean.
- They aren’t moisture-proof. The termination ports are open, and there are openings for test probes. Don’t put them where you wouldn’t put traditional ones. (Yes, there are traditional style wire nuts that are made for wet environments, with seals and dielectric grease, etc. As far as we are aware, there are no lever-nuts for that. However, Wago does have a product line called Gelbox, which is made of small snap-close gel-filled boxes that clip around lever nuts for wet environments. We don’t have any experience with these, so we won’t speak to them other than to say they exist. If that interests you, poke around at the bottom of the Wago page linked at the beginning of this post.)
- Lever-Nuts® do not provide any strain relief, just like traditional connectors. Don’t clip in and then pull everything snug or at extreme angles. Leave some slack. If you’re installing one in the middle of a long run, fasten your cabling appropriately, and with a loop, so that strain can’t be easily put on the connections accidentally by someone else down the road.
- Throughout this post, we have been referring to Wago brand Lever-Nuts® (a name they have registered), and their 221- product line. If you head over to Google after reading this, and search for “lever nut”, you’ll get a lot of Wago, but you’ll also get many other brands, and a vast range of pricing and resellers. As with everything these days, but particularly with small electrical components, the market is flooded with no-name (and no-quality) items. Regardless of our preferences, look into and test products from a reputable vendor and manufacturer, with specifications you can rely on.